Create Visual Studio project for Sharepoint
Many time we, Developers, gets a dev environment with a SP farm and need to get to work.
it usually comes in 2 stages, 1st is to create a new WebApplication up to having an actual site running, and that is covered here.
this is the 2nd part where we create a new Visual Studio project for Sharepoint and connect it to our brand new site :).
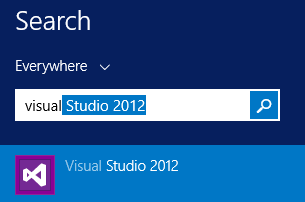
1. Open Visual Studio (da...)
2. Click "New Project", enter "sharepoint" in the search box, and choose "SharePoint 2013 - Empty Project"

3. in the opened dialog box, enter the domain url for your new site, and choose "Farm Solution"

4. Create new item

5. in the search box enter "webpart" to see available webparts templates, in this tutorial we will add a visual webpart. notice that in SP2010 the resutls will be a bit different. BTW, i prefer the UC/SmartPart template like in SP2010 and still use it since its much easier to change an .ascx file, while with this template even the ".ascx" is actually managed code, meaning you need to rebuild after every change.

6. lets put an asp:label and set the text to "Good Morning Dear!"

7. add the webpart to a feature

8. deploy the solution. VS gives you a shortcut, instead of creating a .wsp file, powershells, ect. ect.

9. when this is all over, go to a page in the site and edit it, make sure its a layout with a webpart-zone, and click "Add a Web Part"

10. Choose your brand new WP form the gallery

11. the end :)

12. bonus
a. if you are writing code you should always ask VS to auto-copy your .dll's to the gac/bin
b. sometimes your feature fails to deploy, so you can simple ask VS to Force-Install it

GOOD LUCK!
it usually comes in 2 stages, 1st is to create a new WebApplication up to having an actual site running, and that is covered here.
this is the 2nd part where we create a new Visual Studio project for Sharepoint and connect it to our brand new site :).
1. Open Visual Studio (da...)

3. in the opened dialog box, enter the domain url for your new site, and choose "Farm Solution"

4. Create new item

5. in the search box enter "webpart" to see available webparts templates, in this tutorial we will add a visual webpart. notice that in SP2010 the resutls will be a bit different. BTW, i prefer the UC/SmartPart template like in SP2010 and still use it since its much easier to change an .ascx file, while with this template even the ".ascx" is actually managed code, meaning you need to rebuild after every change.

6. lets put an asp:label and set the text to "Good Morning Dear!"

7. add the webpart to a feature

8. deploy the solution. VS gives you a shortcut, instead of creating a .wsp file, powershells, ect. ect.
9. when this is all over, go to a page in the site and edit it, make sure its a layout with a webpart-zone, and click "Add a Web Part"
10. Choose your brand new WP form the gallery

11. the end :)
12. bonus
a. if you are writing code you should always ask VS to auto-copy your .dll's to the gac/bin
b. sometimes your feature fails to deploy, so you can simple ask VS to Force-Install it

GOOD LUCK!
Comments
Post a Comment